The Blood Stained Shrine stands as one of Ghost of Tsushima’s most intriguing locations, tucked away in Izuhara with a haunting presence that draws both casual explorers and completionists. This blood stained shrine in Ghost of Tsushima holds more than just atmospheric storytelling, it’s packed with valuable collectibles, lore-rich environmental details, and combat encounters that test your samurai skills. Whether you’re hunting every secret the island has to offer or seeking to understand the deeper narrative threads woven throughout the game, this guide covers everything you need to conquer the Blood Stained Shrine and claim its hidden rewards. From pinpointing its exact location to mastering the combat encounters inside, we’ll break down every aspect of this fascinating destination.
Table of Contents
ToggleKey Takeaways
- The Blood Stained Shrine in Ghost of Tsushima is located in southeastern Izuhara and offers valuable collectibles, lore-rich environmental details, and combat encounters that test your samurai skills.
- Prepare thoroughly before entering by equipping defensive armor, stocking healing items, and upgrading your katana, as the shrine features structured combat with Mongol Warriors, Archers, and elite enemy variants in tight corridors.
- Hidden collectibles within the Blood Stained Shrine include additional Charms, artifacts that reveal the shrine’s tragic history, and records that provide context about the Mongol invasion’s spiritual impact.
- The shrine symbolizes the broader tragedy of Tsushima’s invasion and represents Jin Kaminari’s mission to restore honor to defiled sacred spaces, adding narrative depth beyond its gameplay challenges.
- Use tactical positioning behind pillars and architectural cover to mitigate archer threats, prioritize eliminating ranged enemies first, and master different stances to counter diverse enemy types effectively.
- Thorough exploration of the Blood Stained Shrine contributes to 100% region completion and rewards players who engage with Ghost of Tsushima’s environmental storytelling design philosophy.
What Is The Blood Stained Shrine?
The Blood Stained Shrine is a Shrine location in Ghost of Tsushima that combines environmental storytelling with tangible gameplay rewards. Unlike the game’s standard Shinto shrines where you can meditate or find simple collectibles, this particular shrine has sustained combat damage and carries a darker history etched into its architecture and surroundings.
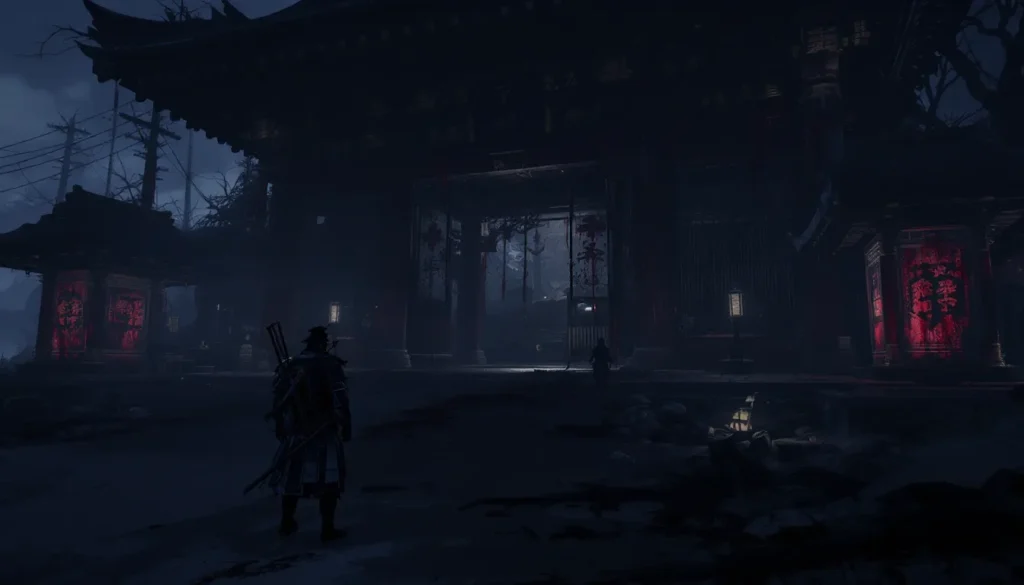
You’ll recognize it by its distinctive red aesthetic, weathered torii gates, bloodstained wooden structures, and an overall sense of tragedy that separates it from the serene beauty of most Tsushima locations. The shrine serves dual purposes in your journey: it’s a mandatory point of interest for completion hunters seeking all shrines on the map, and it offers meaningful lore that enriches your understanding of the island’s suffering under Mongol occupation.
Inside, you’ll encounter structured combat scenarios rather than random encounters. The shrine acts as a mini-dungeon of sorts, requiring you to progress through enemy encounters before accessing the inner sanctum. This design makes it distinct from typical exploration zones and demands preparation before entering.
Location & How To Find It
Finding the Blood Stained Shrine requires knowing exactly where to look, as it doesn’t broadcast its location with obvious markers until you’ve unlocked it through exploration or discovery.
Map Coordinates And Region
The Blood Stained Shrine is located in Izuhara, Ghost of Tsushima’s southern region. More specifically, you’ll find it in the coastal area between Kuta and the Ariake Way, south of the main settlements but accessible without needing to venture into the most dangerous enemy-controlled territory.
If you’re using the in-game map, head toward the eastern coast of Izuhara. The shrine sits somewhat isolated, which contributes to its foreboding atmosphere. On your map, it’ll appear as a shrine marker once you’re close enough or have discovered it previously. The exact coordinates place it roughly in the southeastern quadrant of Izuhara, making it a worthwhile detour if you’re already exploring that region’s other points of interest.
The shrine’s isolation isn’t accidental, developer Sucker Punch designed many of Ghost of Tsushima’s meaningful locations to reward exploration rather than hand-holding. You can stumble upon it naturally if you’re thorough in your island exploration, or you can fast-travel directly to it once discovered.
Travel Tips & Fastest Routes
The fastest route depends on where you’re currently located. If you’re in the Kuta settlement area, head directly southeast toward the coast. The path is relatively clear of major obstacles, though you may encounter roaming Mongol patrols depending on your progress in liberating the region.
From Castle Town or other northern Izuhara locations, travel south along the main roads, then veer toward the coast. The journey typically takes 2-3 minutes on horseback, depending on whether you’re taking a direct route or stopping to investigate other points of interest along the way.
Consider traveling during daylight hours initially to get a clear view of the shrine and its surroundings. This helps you plan your approach and identify enemy positions before committing to combat. Once you know the layout, nighttime visits become more tactical.
Bring healing supplies (Health Potions and Divine Protections) before arriving. The shrine houses combat encounters, so you’ll want maximum resources. Stock up at nearby settlements before making the trek. If you’ve already cleared Izuhara of Mongol occupation, the journey becomes significantly safer, though the shrine’s internal challenges remain.
Completing The Blood Stained Shrine Objectives
Completing the Blood Stained Shrine isn’t a single binary objective, instead, it involves progressing through internal challenges and defeating enemies that guard the shrine’s deeper areas.
Primary Challenges & Rewards
The shrine’s primary objective revolves around clearing enemy groups that have desecrated the sacred space. You’ll face multiple combat encounters as you progress deeper into the shrine, with enemies becoming progressively more dangerous.
The main reward for completing the shrine is acquiring a Shrine Charm, a special item that provides specific stat bonuses. The charm you receive at the Blood Stained Shrine grants bonuses tied to the shrine’s narrative significance, expect benefits to Melee Damage or Health depending on how Sucker Punch designed this particular reward. Also, you’ll unlock the shrine as a fast-travel point, which becomes invaluable for future exploration runs.
Secondary rewards include materials for weapon and armor upgrades, specifically, you’ll obtain Iron and Supplies that contribute to your crafting pool. These materials aren’t exclusive to the shrine, but the quantities you acquire here represent meaningful progress toward upgrading your gear.
Completion also requires you to honor the shrine through optional meditation or simply by clearing it of Mongol presence. The game tracks this as part of your Izuhara completion percentage, so finishing the Blood Stained Shrine contributes to achieving 100% in the region.
Combat Encounters Inside The Shrine
The internal combat structure typically follows a progression-based design. You’ll enter through the outer courtyard, encounter your first enemy group, then push deeper into the shrine as you defeat successive waves.
Expect to face Mongol Warriors and Archers as primary enemy types, with potentially one Shaman or Captain-level enemy serving as a mini-boss scenario. The difficulty scales appropriately to where you likely are in the game’s progression when you first discover the shrine, if you’re exploring early, encounters will be manageable: if you’ve already cleared most of the island, expect tougher variants like Spear Wielders or Shield Bearers.
The shrine’s tight corridors and interior spaces make it distinct from open-field combat. You won’t have the luxury of circling enemies or creating distance easily. This environment rewards close-range abilities and counter-based playstyles over hit-and-run tactics. Consider equipping stances that excel in confined spaces before entering.
Use the shrine’s pillars and architectural features as environmental cover. Some enemy arrows can be mitigated by positioning yourself behind stone structures. This transforms the encounter from pure skill-based combat into tactical positioning, a welcomed shift that adds complexity beyond just timing your parries perfectly.
Hidden Collectibles & Items To Discover
The Blood Stained Shrine contains several hidden collectibles that reward thorough exploration. These items require specific attention to detail and sometimes backtracking after you’ve cleared the area of enemies.
Charms, Artifacts, & Equipment
Beyond the primary Shrine Charm you’ll obtain from completion, the Blood Stained Shrine contains additional charms hidden in less obvious locations. Search behind overturned furniture and crumbled walls for secondary charms that enhance specific playstyles. Some charms boost Stance Damage, while others increase Status Effect Duration.
Look for artifacts scattered throughout, these are cosmetic collectibles that add to your artifact count and provide lore tidbits about the shrine’s history. Artifacts at the Blood Stained Shrine often relate to the shrine’s tragic past, with descriptions revealing what happened during the Mongol invasion. Collecting these artifacts contributes to a broader narrative understanding of how the invasion impacted Tsushima’s spiritual sites.
For equipment, you might discover Dyes that allow you to customize your samurai’s appearance, Ghost of Tsushima Dye offers a comprehensive guide on customization options available throughout the island. Shrine-specific dyes often carry thematic colors reflecting the location’s aesthetic, expect reds and darker tones befitting the Blood Stained Shrine’s appearance.
Record Locations & Secrets
Records (also called “Recordings” in some community discussions) are audio files you discover and collect throughout Ghost of Tsushima. The Blood Stained Shrine contains at least one record that provides historical context about the shrine’s construction and significance before the invasion.
Records are typically found in secondary rooms or alcoves rather than the main path. You’ll need to explore thoroughly after clearing enemies. The Blood Stained Shrine’s record is usually located in the innermost chamber, requiring you to navigate through all enemy encounters first.
Once collected, records contribute to your overall collectible completion tracking. They’re essential for players pursuing 100% completion and offer world-building details that enhance immersion. The shrine’s record specifically elaborates on why this location was targeted by Mongol forces and what spiritual significance it held to the island’s inhabitants.
Use your Guiding Wind feature (once unlocked through story progression) to help locate hidden items. The game’s environmental design makes hidden collectibles visible once you activate this mechanic, eliminating the need for blind searching. But, discovering secrets organically before using Guiding Wind provides a stronger sense of accomplishment.
Lore & Story Significance
The Blood Stained Shrine represents more than a combat gauntlet, it embodies the broader tragedy of Tsushima’s invasion and the Mongol forces’ disrespect for sacred spaces. Understanding its narrative role enriches your appreciation for the game’s world-building.
Narrative Context In Ghost Of Tsushima
The shrine’s significance ties directly to Ghost of Tsushima’s central conflict: the clash between traditional Samurai honor and practical survival against overwhelming odds. The Blood Stained Shrine symbolizes this collision. The Mongol occupation desecrated what was once a sacred place of peace and meditation.
Within the broader story, protagonist Jin Kaminari’s journey involves liberating Tsushima island by island, region by region. Restoring honor to defiled locations like the Blood Stained Shrine becomes part of his personal mission beyond just defeating the Mongol Khan himself. Each cleared shrine and restored location represents reclaiming Tsushima’s identity.
The shrine’s blood-stained aesthetic directly references the violence perpetrated during the invasion. It’s not merely decorative, it’s a visual representation of spiritual violation. Jin’s actions in cleansing the shrine of Mongol forces represent both literal liberation and spiritual restoration. This thematic element connects to one of the game’s core questions: what does honor mean when survival demands dishonorable tactics?
Story-wise, clearing the Blood Stained Shrine progresses your character’s understanding of the invasion’s true cost. You’re not just fighting for land: you’re fighting for your culture and spiritual identity.
Environmental Storytelling & Background Details
Every detail in and around the Blood Stained Shrine communicates narrative information without explicit exposition. The crumbled walls show signs of impact damage, arrows, fire, and blades have scarred the structure. Mongol banners left behind indicate how long they occupied this space. Scattered incense sticks and overturned offering bowls suggest residents fled hastily during the invasion.
Inside the shrine, you’ll notice claw marks on wooden beams and scorch marks from fire damage. These details suggest the Mongols didn’t just occupy the shrine, they actively desecrated it, perhaps in attempts to demoralize the island’s spiritual inhabitants. The environmental design communicates the invasion’s brutality without requiring NPCs to spell it out.
Look closely at decorative elements: original shrine decorations contrast sharply with Mongol military equipment scattered throughout. This juxtaposition visually reinforces the collision of cultures. The shrine’s architectural style, rooted in traditional Japanese aesthetic, now exists alongside crude Mongol weaponry and armor.
Collected records and artifacts further flesh out the shrine’s history. Through these collectibles, you learn about the priests who once maintained the shrine, the families who visited for blessings, and the spiritual practices that once made this location important to the island’s community. Sucker Punch’s commitment to environmental storytelling means you can piece together the shrine’s complete history through careful observation and collectible discovery.
For players seeking deeper understanding of Ghost of Tsushima’s narrative design, the Ghost of Tsushima Secrets: Uncover Hidden Treasures and Legendary Upgrades guide covers how shrines and similar locations contribute to the game’s broader storytelling framework.
Optimal Strategy & Combat Tips
Succeeding at the Blood Stained Shrine requires more than skill, it demands strategic preparation and tactical awareness tailored to the shrine’s unique environment.
Recommended Gear & Upgrades
Before entering, equip armor that balances Defense and Melee Damage. The shrine’s tight spaces mean you can’t entirely avoid incoming hits, so prioritize defensive stats alongside offensive capability. The Samurai Armor or Warrior’s Armor provides solid baseline protection, though by the time you discover the shrine, you might have access to upgraded variants.
Gear recommendation varies based on your preferred playstyle. For aggressive players, stack Melee Damage increases through charms and armor bonuses. Your goal becomes clearing enemies quickly before they overwhelm you with numbers. For defensive players, prioritize Health and Damage Reduction charms, allowing you to sustain longer engagements.
Weapon-wise, your Katana serves as your primary tool, no special requirements there. But, ensure your katana is fully upgraded before attempting the shrine. Upgrade quality directly impacts damage output and your ability to end encounters decisively. Bring Healing items: stock at least 3-5 Health Potions and 1-2 Divine Protections.
Charms to equip before entry:
- Charm of Melee Damage (increases your primary damage output)
- Charm of Health (expands your health pool)
- Charm of Status Effects (if you use abilities that inflict Poison or Bleed)
Upgrades matter significantly. According to players on gaming communities, Game8’s tier lists and build guides often highlight optimal armor combinations for shrine encounters across different difficulty levels. Consulting such resources helps tailor your loadout to your specific challenge level.
Enemy Types & Battle Tactics
The Blood Stained Shrine predominantly features Mongol Warriors as standard enemies. These are competent combatants but lack the specialized training of elites. They use straightforward sword attacks and respond predictably to parries, use your Stone Stance against them for maximum counter damage.
Archers present the primary threat in the shrine environment. Their arrows deal significant damage, and the confined space limits your ability to dodge effectively. Use pillars and walls as cover, and when archers fire, position behind architectural features. Once you close distance, they’re vulnerable, their melee combat ability pales compared to warriors.
Expect at least one elite-class enemy, possibly a Spear Wielder or Shield Bearer acting as a mini-boss. These enemies require patience. Don’t rush, read their attack patterns, identify openings, and capitalize with your best abilities. Unblockable attacks from shield bearers can only be avoided or parried with specific stances: practice the Water Stance for flowing defense against aggressive combinations.
Tactical approach:
- Assess the arena before engaging, identify cover, chokepoints, and escape routes
- Engage prioritized targets first, archers should typically die before warriors when possible
- Use terrain to separate enemies and prevent being surrounded
- Manage your cooldowns, don’t waste powerful abilities on weak enemies
- Maintain health awareness, use healing items proactively, not reactively
Special abilities prove invaluable in shrine encounters. Your Heavenly Strike ability can break through shield defenses, while Dance of Wrath clears multiple enemies simultaneously. Depending on your upgrade progression, these abilities might single-handedly turn difficult encounters.
For comprehensive strategy guides on Ghost of Tsushima combat systems, Shacknews’ walkthroughs provide detailed breakdowns of enemy patterns and optimal ability usage across different encounter types. Also, consulting Ghost of Tsushima Difficulty helps contextualize enemy difficulty and adjust your approach accordingly.
Consider your difficulty setting. If you’re on Hard or Nightmare difficulty, enemies deal increased damage and have more health, this makes preparation even more critical. Ensure every upgrade is maximized and every charm slot is filled with beneficial items before attempting shrine encounters on higher difficulties.
Conclusion
The Blood Stained Shrine stands as a compelling destination that merges gameplay challenge with narrative depth. It’s not just a checkpoint on your completion checklist, it’s a microcosm of Ghost of Tsushima’s broader themes about invasion, honor, and the cost of resistance.
Mastering this location requires three things: careful preparation with upgraded gear and stocked supplies, tactical awareness during combat encounters, and thorough exploration to claim all hidden collectibles and records. Whether you’re chasing 100% completion or simply interested in experiencing Ghost of Tsushima’s rich environmental storytelling, the Blood Stained Shrine rewards dedication.
The shrine’s combat encounters will test your mastery of different stances and abilities, making it an excellent mid-game checkpoint to gauge your samurai progression. Its lore adds meaningful context to the broader Mongol invasion narrative, enriching your understanding of why Jin’s mission matters beyond surface-level “defend your island” motivation.
As you explore the Blood Stained Shrine, remember that Ghost of Tsushima’s design philosophy emphasizes organic discovery. Take time to absorb the environmental details, read the records you find, and appreciate how Sucker Punch communicates history through visual design. Your journey through this location becomes not just a gaming session but an immersive experience that deepens your connection to Tsushima’s world and its people. For those pursuing comprehensive mastery of Ghost of Tsushima, Ghost of Tsushima Secrets: Uncover Hidden Treasures and Legendary Upgrades continues the journey beyond individual shrines, revealing how each location fits into the game’s complete picture. If you’re interested in the full spectrum of Ghost of Tsushima content, exploring the Ghost of Tsushima Archives ensures you won’t miss crucial guides and strategies for your samurai adventure.

